On this publish, we’ll current you the suitable approach to arrange VirtualBox Customer Additions on RHEL 9 or RHEL 8.
VirtualBox is a popular virtualization platform that lets you create and run digital machines on quite a few host working strategies. Whereas working a digital machine, you might need expert limitations by the use of show display screen choice, mouse integration, and file sharing between the host and customer strategies. Fortuitously, VirtualBox Visitor Additions can help overcome these limitations by providing additional drivers and choices.
Stipulations
- A Working RHEL 9 or 8 Digital Machine on VirtualBox
- A sudo person with admin rights
- Crimson Hat Subscription or domestically configure Repository.
- Internet Connectivity in case you’re using Crimson Hat subscription.
With none extra delay, let’s bounce into VirtualBox customer additions steps.
Step 1: Start Your RHEL 9/8 Digital Machine
Make certain that your RHEL VM is up and working contained within the VirtualBox. With out placing in VirtualBox customer additions, VM show display screen will seem like beneath,
Step 2: Arrange Required Dependencies
VirtualBox Customer Additions require some stipulations to be put in in your RHEL digital machine. Arrange these dependencies using the following command:
$ sudo dnf arrange kernel-devel -y
This command will arrange necessary devices and libraries needed for the Customer Additions arrange.
Step 3: Mount the VirtualBox Customer Additions ISO
Throughout the VirtualBox window, select “Devices” from the best menu, after which click on on “Insert Customer Additions CD Image.” This movement will mount the Customer Additions ISO inside your digital machine.
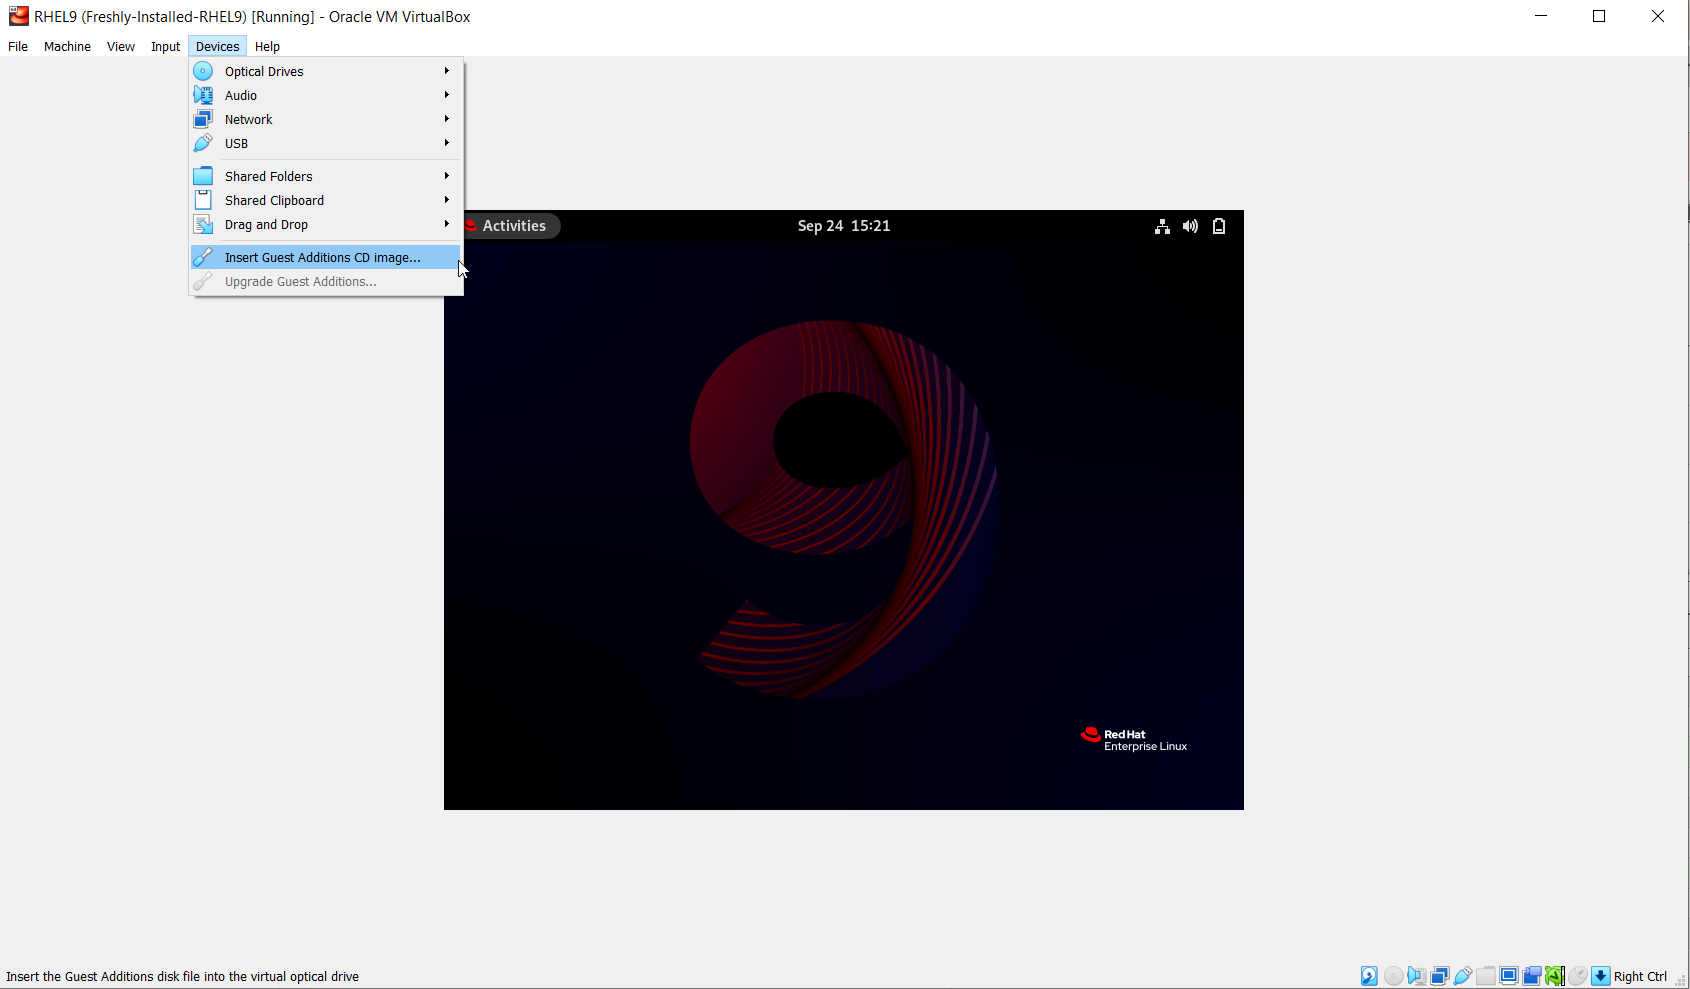
Step 4: Arrange VirtualBox Customer Additions on RHEL 9
Open your terminal in RHEL and navigate to the itemizing the place the Customer Additions ISO is mounted. The default path is normally “/run/media/$USER/VirtualBoxGuestAdditions.”
$ cd /run/media/linuxtechi/VBox_GAs_7.0.4/
To place in customer additions, run the following command as root or with sudo privileges:
$ sudo ./VBoxLinuxAdditions.run
This script will arrange the VirtualBox Customer Additions kernel modules and drivers in your RHEL digital machine.
Step 5: Reboot Your Digital Machine
After the arrange completes effectively, it’s apply to reboot your digital machine for the changes to take impression:
$ sudo reboot
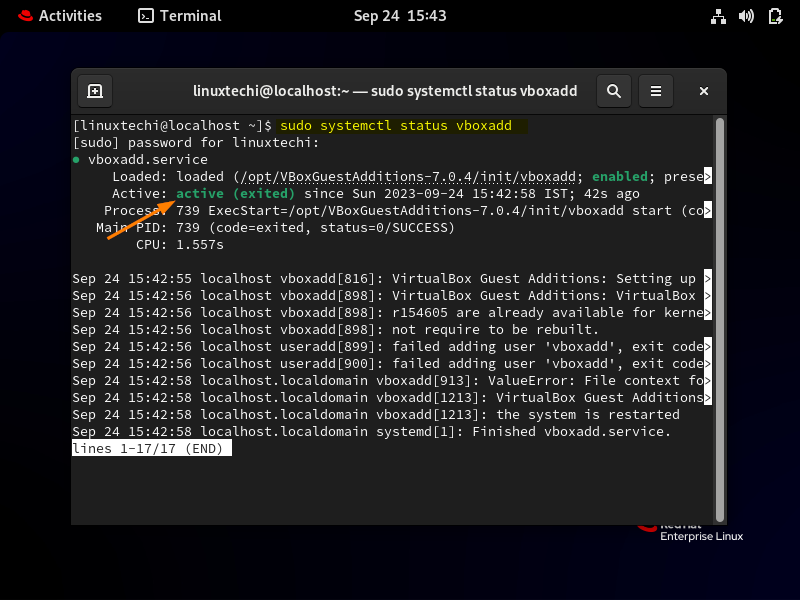
Step 6: Affirm Customer Additions Arrange
As quickly as your digital machine has restarted, it’s possible you’ll affirm the arrange by checking the standing of the VirtualBox Customer Additions service:
$ sudo systemctl standing vboxadd
If the service is energetic (working), you’ve bought effectively put in VirtualBox Customer Additions in your RHEL digital machine.
With VirtualBox Customer Additions put in, now you may benefit from enhanced choices resembling improved show display screen choice, seamless mouse integration, and the pliability to share data between your host and customer working strategies.
Conclusion
VirtualBox Customer Additions are necessary for bettering the usability and efficiency of your digital machines. By following this step-by-step data, you’ve found the suitable approach to arrange Customer Additions on RHEL 9 and RHEL 8, making your virtualization experience smoother and additional surroundings pleasant. Now it’s possible you’ll completely harness the ability of VirtualBox in your progress and testing needs.
Thank you for being a valued member of the Nirantara family! We appreciate your continued support and trust in our apps.
-
Nirantara Social - Stay connected with friends and loved ones. Download now:
Nirantara Social

-
Nirantara News - Get the latest news and updates on the go. Install the Nirantara News app:
Nirantara News
-
Nirantara Fashion - Discover the latest fashion trends and styles. Get the Nirantara Fashion app:
Nirantara Fashion
-
Nirantara TechBuzz - Stay up-to-date with the latest technology trends and news. Install the Nirantara TechBuzz app:
Nirantara Fashion
-
InfiniteTravelDeals24 - Find incredible travel deals and discounts. Install the InfiniteTravelDeals24 app:
InfiniteTravelDeals24
If you haven't already, we encourage you to download and experience these fantastic apps. Stay connected, informed, stylish, and explore amazing travel offers with the Nirantara family!
Source link